This post is going to be a bit of an odd one (aside from the free software pun title) given my usual topics, but it’s one I wanted to share with everybody. Some of you may know that I’m a real ale nut, I much prefer a nice glass of real ale to any of the carbonated rubbish in the supermarkets. I’m also a CAMRA member and my favourite breweries are Millstone in Mossley (especially their amazing True Grit), Hornbeam, and Badger, one of a few decent supermarket real ales.
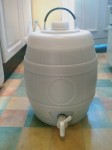
Rather than spend another week off work milling around the house doing nothing and watching DVD’s I decided to get something important done, and start up my own little home brewery!  First port of call (as usual) was the internet, where there’s an amazing array of home brewing information available, JimsBeerKits is an excellent resource with loads of guides and a very active forum. As for the equipment I found a small local supplier TheBrewShop in Stockport who were very helpful and set me up with a great beginners kit for only £46, with everything I needed to get started. This included the fermenting bin, 40 pint barrel, tubing and the beer kit itself. After buying a few little bits from Wilkinson’s (sugar, a thermometer and a giant spoon) which I couldn’t find in the house already, I was ready to go.
All the guide’s I had read had stressed the importance of sterilisation as inadequate sterilisation can cause bacteria to grow in the yeast and the beer to gain a fowl taste, so I was extra careful to sterilize the bin correctly, I had a cleaning solution supplied with the kit, enough to clean the bin, barrel and tubing.
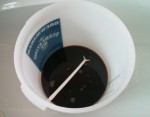
 Next it was time to crack open the beer kit, in this case a John Bull best bitter kit. Bitter is one of my favourites, hence the reason for choosing it. The mixture inside can only be described as like a black treacle, and I later read a tip saying to soak the can in warm water beforehand to loosen it, which I wish i’d spotted earlier. It took me about 10 minutes to scrape all of this mixture out into the fermentation bin. Next I added the sugar into the bin along with several litres of boiling water and stirred it, and if you’re trying to guess what that would smell like, don’t, believe me it’s not nice!
 The finished broth now needed to cool slightly before I could go any further. Once it had cooled sufficiently it was time to add in the cold water to make it up to 25 litres, or around 40 pints, this almost filled the fermenting bin to the top. Needless to say I almost broke my back carrying this downstairs, and really should have rethought where I carried out the filling of the bin.
 The mixture then needed to settle at room temperature which took a few hours due to the ice cold tap water I had used! It was then time to add the yeast into the fermenting bin and kick off the fermentation process. I had heard horror stories about fermentations failing or stalling with homebrew kits and was a little worried about this happening with mine, but it seemed to get started and after 6 hours or so I had a head on the top, and although I had to leave the house (missing the time when most of the fermentation would have happened) I was confident that all went to plan.
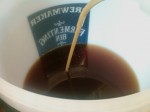
 After about 7 days, with fermentation under my stairs well and truly complete it was time to move the beer from the bin into the barrel. This required sterilising the barrel and the siphon tubing and siphoning the beer off. I had a pleasant surprise when opening the fermenting bin when I found the beer actually looking and smelling like beer, something it certainly hadn’t done the last time I’d seen it. I lifted the bin onto the kitchen worktop while starting the transfer of the beer into the barrel via the tubing. This took about 15 minutes and the objective is to move the liquid with as little disturbance as possible, harder than it sounds.
After capping the barrel I realised I had forgotten to add the additional sugar to the barrel, so had to crack it open again and stir in some sugar. This additional sugar would ferment in the brew, adding sparkle to the beer.
 Given that the weather was nice I moved the capped keg to the garage so it could clear, it would get plenty of sunlight and would be fairly warm for the next few days at least.
After about 2 1/2 weeks in the garage (over 3 weeks in total) I decided to take sneak peek at how we were getting on, and was very surprised. The ale had plenty of sparkle, a good head, no nasty vinegar tastes and actually tasted very nice. Quite similar to the Robinsons Smooth Bitter I usually drink at the Sycamore. Unfortunately it wasn’t quite cleared yet, so another week or so in the keg was called for.
After another fortnight the beer appears to be 100% ready, the beer is completely cleared and it tastes beautiful. I am certainly impressed with my first attempt at beer making, and will definitely be attempting it again with another kit (probably an old English ale kit this time if I can find one). Home brewing is an excellent hobby, and there’s a great feeling knowing that you’re drinking something you’ve made yourself, as well as the knowledge that what you’re drinking is alive, unlike the cheap, fizzy, supermarket rubbish!
All that’s left to do now is drink it!
3 Comments
I’m not familiar with Robinsons Smooth Bitter, and their website doesn’t help much, but I assume that it’s keg. If so then your home made beer will have the edge as it is live.
You’ll have to start experimenting with all the raw ingredients one day 😉
I totally delight in brewing beer at home! It has been such a neat hobby. My family has been behind me, but most especially while its time to try my latest concoction. I was amazed to learn that it is actually the fruitier seasonal brews that I prefer. Just wanted to say thank you for the advice you’ve left along the way, its been helpful.